Create a Quote Request Form Free With Photo Upload
Do you lot run a services business organization and want to requite your site visitors an easy way to asking a quote from you? Being able to requite customers an idea of what they can expect to pay for a service you provide is helpful for establishing contracted piece of work between you and your clients.
In this article, nosotros'll show you how to create a request a quote class in WordPress.
Benefits of a WordPress Quote Request Form
Many times, businesses display their phone numbers and then customers tin can call and request a quote. Yet, while this method works for large businesses, information technology presents several challenges for small business owners:
- Limited Availability – If you're an owner operator, you may not exist available to answer the phone all the time. This can lead to lost sales opportunities.
- Lack of Details – Sometimes you need specific details to gear up a quote, which tin require multiple phone calls back and forth with the client. This can be frustrating for both sides.
- No Records – Unless you utilize a CRM, it'due south hard to keep records of communications. You lot might finish up losing money because of this disorganization, which hurts your bottom line.
That's why smart business organisation owners apply a request a quote course to automate processes and grow their business.
With a request a quote form, you tin get specific information from potential clients and apply smart logic to tailor the form based on user'southward needs.
This will improve customer satisfaction and heave retention.
WPForms is the best WordPress Form Builder plugin. Get it for free!
You lot can also automatically integrate your form with an email marketing service to close more deals, build a bigger email list, and grow your business.
In fact, WPForms currently integrates with the following email marketing services, making your life easier:
- Constant Contact
- AWeber
- Mailchimp
- GetResponse
- Campaign Monitor
- Drip
Now let's take a expect at how to create a request a quote class in WordPress with a plugin.
How to Create a Request a Quote Form in WordPress (Template)
Nosotros put together a video tutorial so yous can follow forth with this guide.
If you'd prefer to read the instructions, hither'south a step-by-step guide on creating a WordPress request a quote form.
- Create a Request a Quote Form in WordPress
- Customizing Your Request a Quote Form
- Add Smart Logic to Your Form
- Customize Your Course General Settings
- Configure Your Request a Quote Form's Notifications
- Configure Your Request a Quote Class's Confirmations
- Add together the Request a Quote Course in WordPress
Footstep i: Create a Asking a Quote Form in WordPress
The start matter you'll need to practice is install and activate the WPForms plugin. For more details, follow this step by step guide on how to install a plugin in WordPress.
Side by side, go to WPForms » Add together New to create a new form.
On the setup screen, name your class and select the Request a Quote Course template.

WPForms will create a asking a quote form.
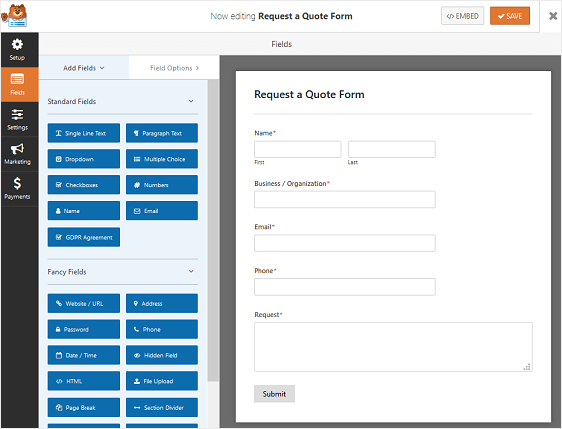
Here, yous can add additional fields to your quote request form by dragging them from the left hand console to the correct hand panel.
To customize the form fields, click on them to make changes. You can too click on a grade field and drag it to rearrange the club on your request grade.
In one case you're done customizing your grade, click Salvage.
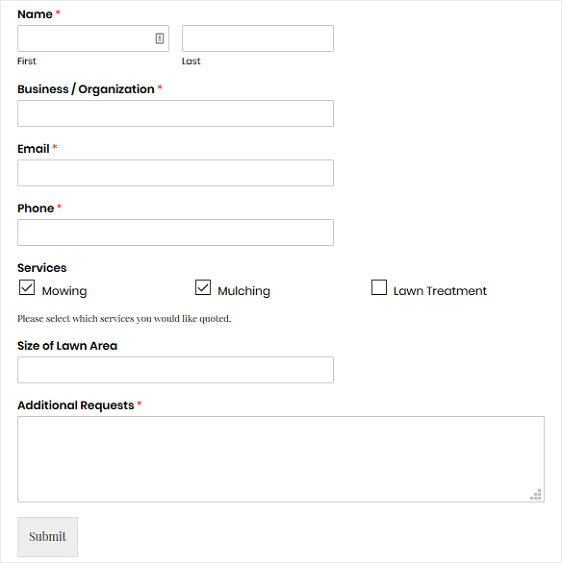
For our case, we'll create a request a quote form for a landscaping business organization.
Step 2: Customizing Your Asking a Quote Form
WPForms allow you to get together all the information you need to create a custom quote for your customers.
To assistance you lot with some common customizations you lot might want to make to your quote asking grade, we'll first bear witness y'all how to add checkboxes to it so customers tin can select which services they want quotes for.
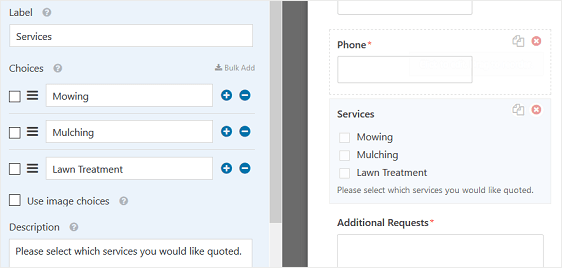
For our landscaping business instance, we'll add a checkbox for services similar mowing, mulching, and lawn treatment.
Y'all can add a checkbox field by post-obit these steps:
- In the WPForms Form Editor, nether Settings, go to Add Fields
- Drag the field "checkboxes" to the right manus panel of your course
- Click on the checkboxes field in the preview console to make changes
- Label your field, add the service options, and include a description explaining to site visitors what to do
- If you want to add prototype choices next to your service options, check out our tutorial on how to add prototype choices to WPForms
If you have a lot of service options for people to pick from, and desire to split your checkboxes into several columns, get to Advanced Options and selection your Choice Layout to be 1, two, 3, or inline columns.
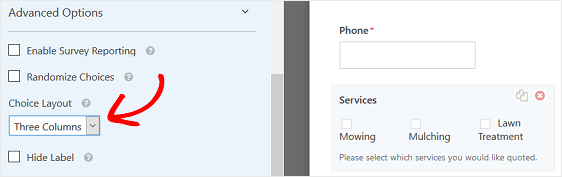
This volition make your form more organized and prevent form fatigue.
Now for some people, this is all they'll need. If that'due south true for you, and so merely salvage your course and skip to configuring your fomr's settings.
However, if you want to reduce the size of your form because it's long, and so you can enable smart conditional logic to help streamline the process of filling out your WordPress request form for potential customers.
Footstep three: Add Smart Logic to Your Form
WPForms smart logic allows you to evidence or hide form fields based on what the user selects. This is extremely helpful when you need additional information to prepare the best estimate, but don't want to bog downwards site visitors with form fields that don't apply to them.
For our landscaping example, yous'll need to know the size of the lawn area in lodge to provide the best quote for some of the services you provide.
To showtime, let'south elevate a Single Line Text class field to your form. We'll call this field "Size of Backyard Area." You can change the label based on your asking a quote form needs.
Side by side, become to Advanced Options » Conditionals under Field Options. Click the box labeled Enable conditional logic.
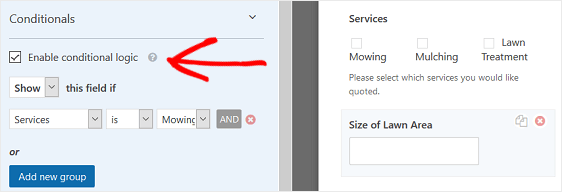
From here, yous tin choose to show a certain field if it meets your user'southward requirements. In our instance, we accept chosen to display the "Size of Lawn Surface area" field if the user has selected the mowing services.
Add every bit many criteria as you need to make your request for quote form make sense.
When yous're done, click Save.
At present we'll await at how to configure your quote request form settings.
Step 4: Customize Your Course General Settings
To start, go to Settings> » General.
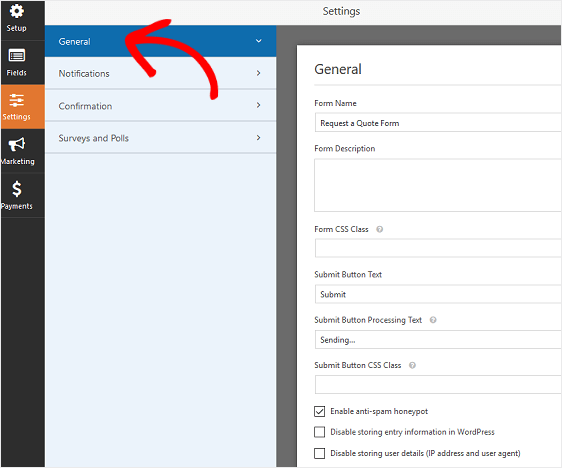
Here yous tin configure the following:
- Grade Name— Alter the name of your grade here if you'd like.
- Form Description — Give your course a description.
- Submit Push button Text — Customize the re-create on the submit push button.
- Spam Prevention — Stop contact form spam with the anti-spam feature, hCaptcha, or Google reCAPTCHA. The anti-spam checkbox is automatically enabled on all new forms.
- AJAX Forms — Enable AJAX settings with no page reload.
- GDPR Enhancements — Yous tin can disable the storing of entry information and user details, such every bit IP addresses and user agents, in an endeavor to comply with GDPR requirements. Bank check out our stride-by-step instructions on how to add together a GDPR agreement field to your simple contact form.
When you're done, click Salve.
Step 5: Configure Your Request a Quote Form's Notifications
Notifications are a great fashion to ship an email whenever a asking for a quote is submitted on your website.
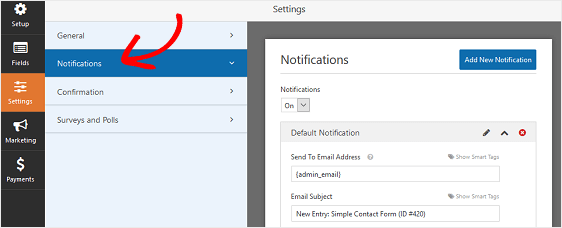
Unless you disable this feature, whenever someone requests a quote from yous, yous'll receive a notification about the request. You can disable this if yous want to.
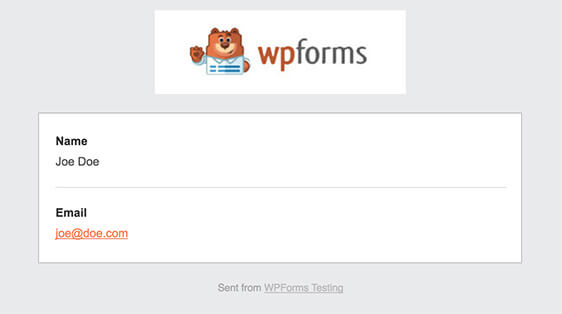
If you use smart tags, you tin can also send a notification email to the user when they submit a request for a quote. This will permit them know their request has been received and that you lot'll be in impact shortly. It volition likewise include any details they entered on the quote form.
For more help with this stride, check out our documentation on how to gear up form notifications in WordPress.
If you want to keep branding beyond your notification emails consistent, you can check out this guide on adding a custom header to your email template.
Step 6: Configure Your Asking a Quote Form's Confirmations
Form confirmations are letters that display to users immediately after they submit a request a quote form on your website. They allow people know their form has been processed and gives y'all the chance to let them know what the next steps are.
WPForms has three confirmation types to choose from:
- Message. This is the default confirmation type in WPForms. When a site company submits a request for a quote form, a simple message confirmation will appear letting them know their form was candy. You lot might give thanks them for their request and allow them know you'll be in touch. Look here for some keen success messages to help boost customer happiness.
- Prove Page. This confirmation blazon will accept site visitors to a specific spider web folio on your site thanking them for their form submission or telling them what to practise next. For help doing this, cheque out our tutorial on redirecting customers to a thank you page. In addition, exist sure to bank check out our commodity on creating effective Thanks pages for boosting customer loyalty.
- Get to URL (Redirect). This option is used when you want to ship site visitors to a different website.
To set upward a form confirmation, click on the Confirmation tab in the Form Editor under Settings.
Next, choose the type of confirmation you lot want to create: Message, Prove Page, or Go to URL (Redirect).
For our example, nosotros'll select Bulletin.
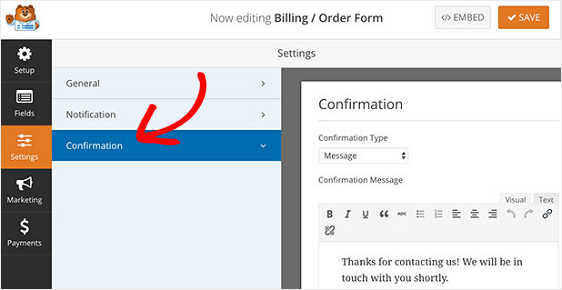
When you're washed, click Save.
For assist with the other confirmation types, meet our documentation on setting upward form confirmations.
At present it's time to add together your request a quote form to your WordPress website.
Step 7: Add the Request a Quote Form in WordPress
WPForms allows you lot to add your forms to many locations on your website, including your web log posts, pages, and fifty-fifty sidebar widgets.
Let's take a wait at the most common mail/folio embed pick.
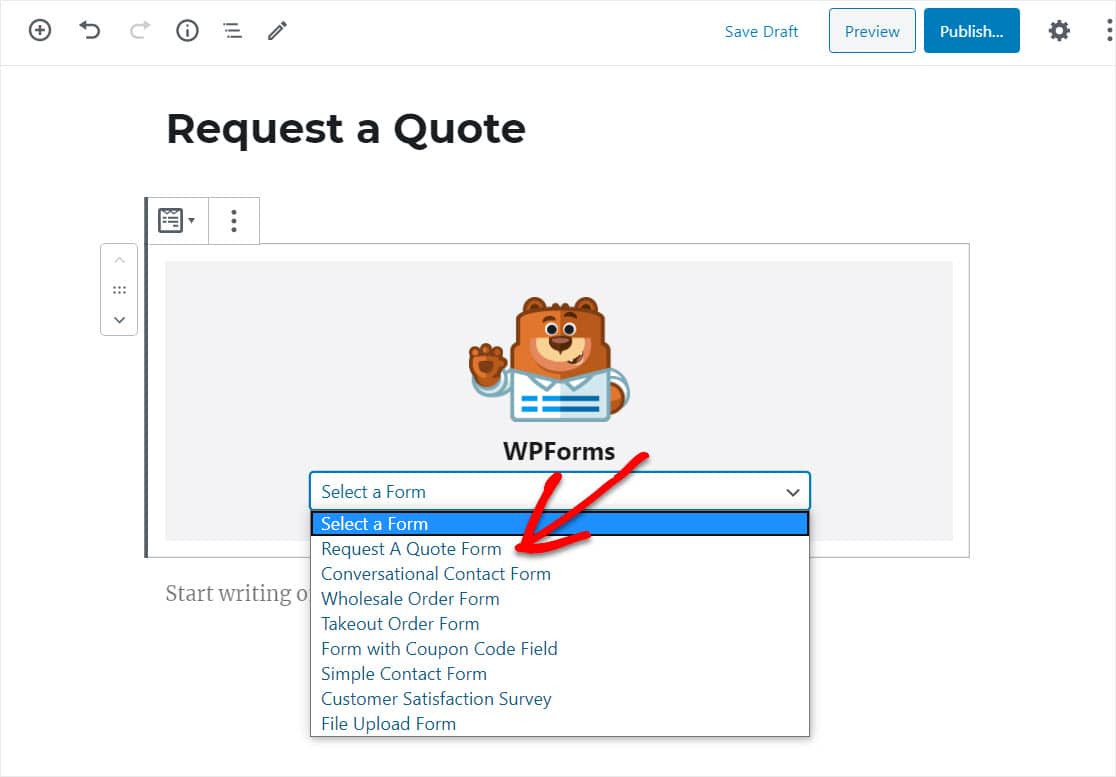
To begin, create a new page or post in WordPress, or go to the update settings on an existing ane. Later on that, click inside the start block (that's the blank area beneath your page title) and click on the +plus sign then the WPForms icon.
The WPForms widget will appear inside your block. Click on the WPForms drib-down and selection which one form you've already created that y'all desire to insert into your page.
Afterward that, publish your page and view information technology.
Below is an case of our request a quote form:
Final Thoughts
And there you have it! You now know how to create a request a quote course in WordPress for your site visitors to fill out.
If you lot want add together an official terms of service or disclaimer to your request a quote class, check out our documentation on how to add a Terms of Service checkbox to your WordPress forms. This helps ensure your users know exactly what'south in store for them when they submit a asking for a quote from you.
So, what are you waiting for? Get started with the nigh powerful WordPress forms plugin today.
And don't forget, if you similar this article, and then please follow us on Facebook and Twitter.
Source: https://wpforms.com/how-to-create-a-request-a-quote-form-in-wordpress/
0 Response to "Create a Quote Request Form Free With Photo Upload"
Postar um comentário